facebook ads for beginners.

In the digital age, social media is an integral part of your business, especially for us in Canada.

Among the various social media ads channels, Facebook particularly stands out. Not only does it have the world’s most significant number of users, but it is also the most inexpensive to advertise on. Being up to 7X cheaper than twitter—the next most affordable option. This post will look at the steps you need to take to succeed in your Facebook ads campaigns when trying to take your business to the next level.

Let’s dive straight in, shall we?

The significance of Facebook advertisements in canada.

Social media is now one of the most effective ways for businesses to generate leads, close sales, and build a loyal customer base. There are several reasons why you should not ignore Facebook advertising. First off, there are over 1.13 billion Facebook users. Over one billion of these users access Facebook through their phones. It demonstrates that businesses’ marketing opportunities are nearly limitless.

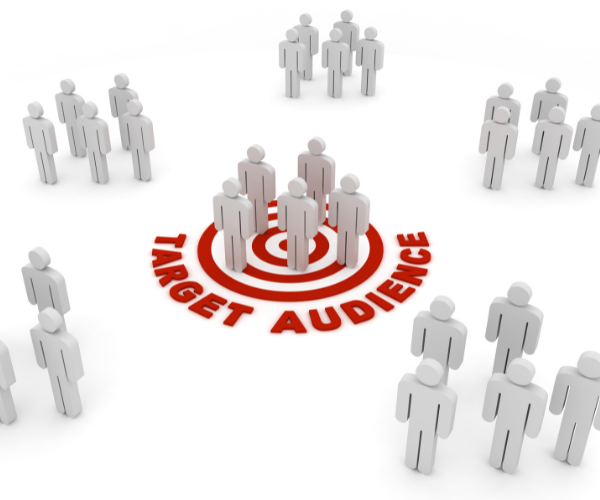
Secondly, the average social media user spends well over 50 minutes every day on Facebook, Instagram and Twitter, and Thirdly, you can market to users based on various demographics such as age, gender and even location. It also enables you to create targeted ads tailored to your target audience. More on this in a moment. 

The pros of Facebook advertising include:
• There is an immediate response of traffic
• It is relatively simple to track your campaigns
• Easy for you to set up Facebook ads
• You can control how much you spend
• Allows for targeted advertising based on various demographics
• You can use images and videos which quickly grab attention
• Easy to determine your cost per conversion, enabling you to calculate an ROI
• Depending on which industry you are in, the cost per click is relatively inexpensive

The cons of Facebook ads:
• It can prove expensive if set up wrong
• Better suited for B2C
• Limited by strict (and often very subjective) rules of what and how you can advertise (like, never advertise anything with liquor in it)

types of facebook ads

Types of Facebook Ads.

Facebook ads are broadly classified as follows:

Image Ads
Always note that the Facebook images should be interesting and grab attention. They should never be boring.

Video Ads
There are several places where Facebook video ads can show. Also, it includes in-stream during a Facebook live video as well as in the news feed and stories.
When you create a video ad, you may want to consider showing your product in action as it solves a problem.
The idea is always to be creative. Remember that you can also create GIFs or animations and it does not always need to be filmed footage. Hit us up if you’d like a GIPHY added to our Oi Marketing creative account.

Carousel Ads You can upload ten images or several videos with these types of ads. One of the significant benefits of these ads is that you can showcase different features of your product. Alternatively, you can use carousel ads to show several other products. You can then add a different link to each image or video.

Slideshow Ads
You can upload ten images or several videos with these types of ads. One of the significant benefits of these ads is that you can showcase different features of your product. Alternatively, you can use carousel ads to show several other products.
You can then add a different link to each image or video.

Augmented Reality Ads
This ad is more interactive with filters and animations that make it easy for viewers to interact with the brand.
Let’s assume you are selling makeup; you could use a feature that allows shoppers to see how a shade of lipstick would appear on their lips.
It is also a great way to reach out to more people as users can take photos of themselves and post them on social media.

Ads on Facebook

Collection Ads
These types of ads are only available for users on mobile. You can add up to five images or videos, each with a separate link that users can use to purchase your products.
The benefit of these ads is that people can purchase products while still on Facebook.
You can even use collection ads to relay information about a product.
For instance, a short video could show exactly how to use the product. Another video could show when to use the product.
Remember that the introductory videos or images can pass the preliminary information about a product. With the remaining pictures or videos, you can add more information.

Instant Experience Ads
One of the significant advantages of instant experience ads and one that sets them apart is how quickly they can load.
They can load many times faster than a mobile website outside of Facebook.

Dynamic Ads
With dynamic ads, you can create ads and send them to customers that have a genuine interest in your products.
I say a shopper went through the buying process on your website but didn’t check out but instead abandoned cart then you can use dynamic ads to promote the product they left.
The above is beneficial since it reminds the potential buyer of the goods.

Stories Ad
There are several places where Facebook video ads can show. It covers the news feed, stories, and in-stream during a Facebook live video.
When you create a video ad, you may want to consider showing your product in performance as it solves a problem.
The idea is always to be creative. Remember that you can also create GIFs or animations and not necessarily filmed footage.

Poll Ads
This option is only available for mobile versions. Here you can add a two-option poll to your video or image. You can then provide a link for each different option. The pol ad will allow you to see the tally of questions to each ad.

Messenger Ads
This feature is only available on mobile devices. You can use this tool to add a two-option poll to your video or picture. There are over 1.3 billion people who use Facebook messenger. After creating your ad, you will simply need to choose Facebook Messenger as the placement. The defining feature of messenger ads is that they often contain a call to action button, starting a conversation with the Facebook page. They allow people to use it to discuss one-on-one with the customer sales reps. Age You can then provide a link for each different option. The pol ad will allow you to see the tally of questions to each ad.

Lead Ad
One thing to note is that lead ads are only for mobile devices. They’re working on making it as simple as possible for clients to provide contact information while also lowering the quantity of typing required. They come in handy when looking for people to send your newsletters to or even encouraging visitors to a free trial of your product. Lead ads are among the most popular ads for generating a sales funnel.

Dashboard for Facebook

How to access your Facebook Ads Dashboard.

Simply head off to your Facebook account, and log in. In the upper right corner, you will find a drop-down menu. Click manage ads. How to use the Facebook Ads Manager in your Facebook ads dashboard, you will find menus, buttons and tools which you will use to influence every part of your ad.
There are many different categories of Facebook ads, 11 to be exact. Companies are capable of assisting a wide range of business challenges. Whether you want to reach out to people in your area or looking to drive traffic. They include:
• Promote your page
• Boost your posts
• Increase conversions on your website
• Send people to your website
• Get installs of your app
• Reach people near your business
• Increase engagement in your app
• Raise attendance at your event
• Get video views
• Collect leads for your business
• Get people to claim your offer

How to choose suitable ads for your business.

On your Facebook ads dashboard, you will see a green button. That’s the button you’ll use to make a Facebook advertisement. The 11 options we’ve mentioned above will pop up via a drop-down menu, allowing you to choose your type of ad. Generally, there are three main steps involved in creating a Facebook ad. You will select the ad, choose the audience and budget, and start the ad. Let’s now go through each type of Facebook ad.

1. Boost your Posts
To create this ad, click on the green button and choose “Boost Your Posts.” Next, select a Facebook page and add its URL. Select an existing update or create a new one. Decide on a name for your campaign. This point finishes the first section. You will then move on to choosing an audience and budget. We will get into more detail about this later.
The last step is to create the campaign. Luckily, boost your posts ads. The creative is already pre-made for you since the creative is your post! You have the option of changing the position that you want to boost. You can also view how the posts appear in the desktop news feed, mobile news feed and desktop right column. You also have a remove button next to each preview to allow you to set whether you want the ad to appear.

2. Promote your Page
You can click “create a new ad” and then click “promote your page.” Other steps involved will include: Pick a Facebook page and add its URL Choose a campaign name for your ad. Next, you will need to choose an audience and budget. You will then move on to the creative elements to add images. You can upload your own. You can also choose from a library of images or choose from a collection of searchable stock images from Shutterstock. You can see how the different pictures perform by creating six ads and loading multiple photos simultaneously.
Remember that the advertisement rejects that has more than 20% text. You also have the option of uploading anywhere between there to seven shots and turning them into a slideshow video. Choose whether you want the slideshow to be rectangular or square. Furthermore, you can also add a video here—time to edit the text that appears above the ad. Simply click the “Text” box. Click “Show advanced options” to customize the headline, choose where the visitor ends up and track conversions.

3. Send people to your website
As usual, click on create a new ad and select send people to your website. The following steps are as follows: Choose and add the URL of the page you want to promote. Choose a name for your campaign. After these initial two steps, you can set your audience and budget. Now it’s time to build the creative. Here, you will select either a single image or video or several images and videos in the ad. When you want to use multiple photos or videos, you can customize the headline, image, call to action and description. You can also add a different URL and landing page for each photo or video. There is also the option of letting Facebook show the images and videos that have the most clicks first. The send people to your website ad can offer in the newsfeed on mobile and the right column on desktop.

4. Increase conversions on your website
You will head back to your dashboard and click create a new addition. You can then choose to increase conversions on your website. Next, select the URL you would like to promote and enter. You must choose a conversion pixel that you will use to track the conversions of the ad. Provide a name for the campaign.
The next step is to choose your audience and budget and then build a creative for your ad. Here you can select a single image or video or select multiple photos and videos. You can then write a headline that will show below the videos or pictures, provide a call to action, add a description that will appear on the image or video. Finally, you can choose how and where you would like the ad to appear. Some options include the right column on desktop, Instagram or the Facebook ads network.

5. Send People to your website
Click on create a new ad on your Facebook adds dashboard and click get installs for your app. The following steps are as follows: Type the name of your app or add the URL from iOS App Store or Google Play Store. Provide a name for your campaign. The next step is to set your budget and your audience. Now it’s time to build the creative for your Facebook ad. You have the option of choosing multiple images or videos. You could also simply go with a single image or video. The get installs add can only appear on mobile websites and apps. You also have the option of linking to a specific screen in your app. You can also set conversion tracking.

6. Increase engagement in your app
Go to create ads and select increase engagement in your app. Type in the name of the app. You can also pass the URL from iOS App Store or Google Play Store. Choose a name for your campaign. Set the audience and budget. It’s now time to build your ad creative. You will notice that the settings for making creatives for your ad are similar to those in getting installs for your app.
The difference is in the destination and goals. With the get installs for your app, your main goal is to get more point of entry signups. Here you will be linking to the installation page of the app. On the other hand, with the increased engagement to your app ad, you will relate to certain app areas to increase engagement in these sections.

7. Reach people near your business
Go to your dashboard, click create an ad, and choose link people near your business. Start by selecting a Facebook page or select the URL of the page and paste. Provide a name for your campaign. Once you have completed the above steps, you will set an audience and budget for your campaign. You will need to choose an area on a map. You’ll need the adverts to reach the folks in these places. While there is a text box where you can input the address you like, the ad will mainly center your business address on the map. You can select a radius of between 1 mile to 50 miles or even choose a custom radius. You can even relocate the target region to a new spot on the map. You’ll also have to design the ad creatives. You may go between pages, call now, send a message, and learn more.

8. Raise attendance at your event
Go to create a new ad on your Facebook ads dashboards and select raise attendance at your event. • Select a Facebook event or enter its URL • Provide a name for your campaign • Select your audience and budget Now it’s time to create the actual ad. When you reach this,
Facebook will automatically grab the main image of the event and suggest this. It will also automatically ad the date, time, and location of the event. You will also get a call to action button named “Interested.” You have the option of adding a text that appears as an update above the ad. To keep in mind with raising attendance at your event ad, pick an image that best represents the event.

9. Get people to claim your offer
Start by going to your Facebook ads dashboard and clicking on create the ad. Then, choose the get people to claim your offer ad. The following steps include: Create an offer or select a request you have created on Facebook Provide a name for the campaign. There are two main ways by which you can create a proposal. Firstly you can do so directly from your Facebook page. You can also make an offer now from the ads page. Having completed your chosen request, you can set the audience and the budget. Then the head of the desktop and mobile news feed previews how the ad will appear. You don’t have much customization the get people to claim your offer ad. However, you can add conversion pixels.

10. Get video views
As with other Facebook ads that we have looked at so far, you will create an ad and select video views. Then you’ll either choose a Facebook page or copy and paste its URL. After that, give your ad a campaign name. Decide on your target demographic and budget.
Now is the time to develop the actual advertisement. Note that you will need to upload a video and share the video. There are a few requirements that you will need with this type of ad. Firstly the video needs to be in the 16:9 aspect ratio. It also needs to be of utmost 2.5GB in size and a maximum of 120 minutes for Facebook. For Instagram, the video needs to be at least 60 seconds long and a maximum of 2.3GB. Note that you have the option of using 3 to 7 videos which you can add as a slide show. Other editing options include customizing the text and the buttons.

11. Collecting leads for your business
Click create a new ad and go to collecting leads for your business. The following steps are as follows: Select a Facebook page. You can also copy and paste its URL, Provide a name for the campaign, set your audience and budget. Now, let’s go to the ad creative. You have the option of customizing the image and the text, which you can place anywhere on the ad. The collecting leads for your business ad offers a lead form for each of the six different button options below:
• Apply Now
• Get Quote
• Download
• Sign up
• Learn More
• Subscribe
You can edit the forms using the Facebook ad editor. Find the customization section, and below this, you will find the lead form section. Here you can create a new lead or attach one that you made previously.
You will get a suggestion on the full name and email. If you want to add more options, simply click below the tips. You also have the option of asking three more questions. You can add a custom question or use the questions that Facebook provides. Also, note that you can customize the answers to the questions. You will ask to link to your policy section after completing this step, which should adhere to BC law and might require at the least a Canadian lawyer.

Audience on Facebook

The Context Card

You can choose to show a context card before anyone heads to the lead form. You can edit the headline, the button text, and the benefit text on the context card. The whole point of the context card is to provide a bit more information about the next steps and the offer. Finally, once you are satisfied with your efforts, you can confirm the settings and Save them.

Choosing an Audience For Your Facebook Ads

One of the areas where Facebook shines is allowing you to select an audience for your Facebook ads. Its means that you can send advertisements to those who would find them helpful and increase the chances of generating leads and making conversions. While there are several strategies that you can use and are involved in selecting the right audience for your business and ad, here is an excellent overview to get you on your way.

Audience Settings Tab
When you select your type of Facebook ad, the next screen you will see is the audience settings tab. There are plenty of tools here, so here is a quick rundown of what you will find:

  • Geographic targeting
  • Creating a custom audience
  • Target by behaviour or interest
  • Adapt your targeting based on how people are connecting to your page
  • Audience selection overview
  • Age, gender and language targeting
  • Audience selection scale

The audience settings page enables you to make precise decisions about who you want to target with your Facebook ads. You have the option of many different factors. The main ones include:

Location

This option lets you exclude or include people who will see your Facebook ad based on their location around the world. You can target people based on the following options: Everyone in this location People who live in this location People recently travelled in this location You can also add the exact location by adding information such as country, state, city, region postal code and address. Having done this, click on the “+25mi” situated next to the city’s name. You will get a drop-down menu from which you select the distance of the radius of the area you want to target. You can fine-tune it to between 10 miles to 50 miles. Repeat the above steps with multiple locations as per your preference.

Age, gender and language

You can simply choose the age you are looking to target by inputting a minimum and maximum age. The ads will send to people who fall within your age requirements. The same goes for gender. While the default settings include all genders, you can also target men or women. The language section can be left blank. However, you can input the language if you intend to send ads to people who live in a region that speaks a specific language.

Interests and Behavior

When it comes to targeting people based on their interests and behaviour, Facebook allows you to get granular with your audience. There are plenty of options available to you here, ensuring that you target the specific audience you require.

User of Facebook

For instance, if you were to choose a target based on demographics, some of the options available under this category include:

  • Job titles
  • Education level
  • Relationship status
  • Income level

Let’s say perhaps you choose your audience based on interest. You could choose:

  • Business
  • Sports
  • Fitness
  • Shopping

Behaviour is another way you can choose your audience and select options such as:

  • Purchasing behaviour
  • Operating systems used
  • Homeowners

Under the interests and behaviour category, you also select an audience based on connections. Its means how the user has interacted with your Facebook page, app or event.

Custom Audiences

Custom audiences offer another target group. It refers to people who have already interacted with your business before. They could either be contacts, or they could be previous customers. Either way, you set up an audience based on previous contacts and send ads to these.

Navigate to the audience settings page and select the Create a Custom Audience option. You’ll be able to see your previous contacts and target audiences. You can use these to send Facebook advertisements.

You will get a pop-up that provides you with three different options to create custom audiences. These are

  • Customer lists
  • Website traffic
  • App activity

How to set a budget for your Ad.

Whenever you choose “create an ad,” you will also need to set a budget. The budget settings allow you to decide how much to spend and when you will spend it.

How to choose a budget.

When choosing a budget, Facebook will automatically suggest a daily budget of $20. However, you have the freedom to decide how much you want to spend and whether you prefer a daily or lifetime budget. Keep in mind that when you set a daily budget, the amount you will choose will be the maximum you will be spending on any given day. As for the lifetime budget, the amount you choose will be the maximum you will spend during the entire lifetime of your ad. Keep in mind that there is no longer an option of running the ad indefinitely. You must choose the start date and end date for your lifetime ad.
Budgeting for Facebook

How to choose a schedule.

When setting a schedule for your daily and lifetime ads, you can select when you want the ads to start and end. With the daily ads, Facebook will suggest running the ad indefinitely. However, you can still choose when to start and end. The same is true with lifetime ads. You simply need to input the dates.

Evaluating Ad Data.

You can evaluate the performance of every ad that you send. Simply access your primary ads dashboard and view an overview of the stats. You have the option of clicking on an individual campaign, ad or set. Here you will be able to view the stats for that particular one. However, you can also view the stats for multiple campaigns and ads by simply clicking the checkbox next to each and then clicking view. Keep in mind that you can set to receive the report via your email. Its lets you view the data later on.

Some tips for creating Facebook Ads.

Now that you have seen how to create Facebook ads, here are a few more tips that you can utilize to get the most of the ad.
Always consider Higher Funnel Marketing.
When creating your Facebook ads, you may tempt to focus on short-term conversions. However, the higher funnel ads can provide similar results at a lower cost to you. Granted, while there is no perfect Facebook ad strategy, you can always start by setting specific and achievable goals before starting with your Facebook ad.

Utilizing Facebook Pixel.

Facebook pixel is simply a remote code that you can use to name most of your Facebook ads. The code lets you make analyses such as tracking conversions, viewing people who viewed your product, and creating targeted campaigns. When you start with Facebook marketing, you may not be ready to use Facebook pixel. Nonetheless, you must install it. When you are preparing to begin remarketing, you’ll have the data you need.

Consider Ad Frequency

For any ad campaign to be effective, you will need to place it in front of potential customers more than once. Only in rare circumstances will any prospect act on an ad after seeing it for the first time. They may not remember the brand’s name after seeing it for the first time. Admittedly, no set quantity will guarantee conversions. However, research indicates that prospects will act on an ad the more they see the brand. Note, however, that you cannot always show the ad multiple times without reaching a limit. Over time, the value of the ad will slow down. Think of it as getting a plateau and then starting to slow down. The higher the quality of the ad, the later it seems to table.

Always Perform Tests.

Never assume what works and what doesn’t work when it comes to your Facebook ads. It is good practice to test everything. Whenever you create a new Facebook ad, track its performance and compare it with previous ads. It will help you see whether your changes improved performance or otherwise. Therefore, you can use the positive changes on future ads and avoid changes that didn’t result in improvements. Remember that best practices for Facebook ads are constantly evolving and always changing. Find out what works best for a specific audience and go with this.

Tracking Performance.

You can view how your Facebook ads perform on the Facebook ads manager dashboard. If you notice that one of your campaigns is not performing well, it is best to place your money on the fulfilling campaign. As you start with Facebook ads, try running several small campaigns with a limited budget. You can then view how each movement is performing and choose the best one. When creating your ad, always ensure to Add keywords. Avoid lengthy sentences and keep it short Add an image or a video Place the photo or video above the URL Use taglines to grab attention.

So, there we have it. Clear as mud, right? If you have any questions about launching Facebook content or ads in Canada, please reach out.